Sinatra Two-Factor Authentication
16 March 2018
Last time we talked about how to add authentication to a Sinatra application. You might want to read that first to refresh your memory. This time I’m going to show you how I built upon that approach to add two-factor authentication. To recap, two-factor authentication (often shortened to 2FA) is a form of multi-factor authentication. The idea is that the user must present two or more pieces of evidence (factors) to an authentication mechanism to prove their identity. Commonly this is something they know e.g. some sign-in credentials such as a username and password, and something only they are in possession of.
This second factor often takes the form of a small hardware device with a display, or more recently an authenticator mobile app, such as Google Authenticator or Authy to name just two. Both have the same purpose, which is to generate a unique token that is entered into the authentication system. Typically this token is a number. The device or app has to be provisioned first before it can be used as part of the authentication process.
This provisioning step generates a random secret key that is unique to that user. This key is used as part of the token generation algorithm. It is often in base 32 and should be held securely server-side along with the user’s credentials and other account details. A URL using the otpauth:// scheme can then be constructed that includes the secret key as a query string parameter. From this URL a QR code can be generated that the user scans once to set up their authenticator app. Then the app can be used at any time to generate tokens that are guaranteed to be valid for that user’s account within that application. During the sign-in process, if both the credentials (first factor) and token (second factor) are correct, authentication succeeds and the user is granted access.
Two-factor authentication has become more common in recent years as online security has tightened up. I think I first came across it when I enabled it for my Gmail account several years ago. At first it seemed like magic and I didn’t understand how the numeric token was generated or verified. As always, once you understand the principles it’s actually pretty straightforward.
The fundamental concept is that of a one-time password or OTP. As the name suggests, OTPs are only valid for a single authentication transaction. Amongst other things this has the advantage that they’re not vulnerable to replay attacks. One type of OTP is a time-based one-time password (TOTP) and that’s what we’ll be using here. If you want to geek out on the low-level details of TOTP, take a look at RFC 6238.
The Ruby One Time Password library is a fantastic RubyGem that does all the 2FA heavy lifting for us. As previously, I’ve created a minimal example application and put the source code on GitHub. This application demonstrates the use of a TOTP and an authenticator app. Let’s take a look.
As before the authenticate! method is a helper method that’s used to intercept requests to URLs that require authentication and present the sign-in screen if no user is current authenticated. However, it now requires a valid token object in the HTTP session. This token object is simply a boolean flag the indicates the user has previously successfully entered their second factor. If the token object is not present then the user is prompted to sign in again. Here’s the code from lib/authentication.rb:
module Authentication
  def authenticate!
    unless session[:user] && session[:valid_token]
      session[:original_request] = request.path_info
      redirect '/signin'
    end
  end
end
Moving to app.rb, the route that the sign-in form POSTs to is a bit more involved this time:
post '/signin/?' do
  if user = User.authenticate(params)
    session[:user] = user
    if request.cookies[NO_2FA_COOKIE]
      session[:valid_token] = true
      redirect_to_original_request
    else
      redirect '/signin/secondfactor'
    end
  else
    flash[:notice] = 'You could not be signed in. Did you enter the correct username and password?'
    redirect '/signin'
  end
end
The flow is complicated slightly, because as a convenience to the user I’m offering a checkbox that when ticked will prevent them being prompted for the second factor until thirty days have elapsed. This is implemented as a browser cookie, the existence of which is checked rather than its actual value.
If the cookie with the name represented by the NO_2FA_COOKIE constant exists, then the valid token flag the authenticate! method checked earlier is put in the session and the user is sent on their way without seeing the second factor screen. If the cookie doesn’t exist then an HTTP redirect occurs to the second factor screen, which looks like this:
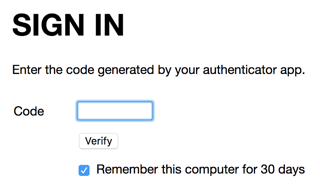
That second factor form submits an HTTP POST request to the /signin/secondfactor route, the handler code for which is shown below:
post '/signin/secondfactor/?' do
  unless session[:user]
    flash[:notice] = 'Your session has expired. Please sign in again.'
    redirect '/signin'
  end
  if session[:user].verify_code(params)
    if params[:rememberme]
      response.set_cookie(NO_2FA_COOKIE, value: '1', max_age: THIRTY_DAYS.to_s)
    else
      response.delete_cookie(NO_2FA_COOKIE)
    end
    session[:valid_token] = true
    redirect_to_original_request
  else
    flash[:notice] = 'The code you entered is incorrect. Please try again.'
    redirect '/signin/secondfactor'
  end
end
If there’s no valid user object in the HTTP session (perhaps because the user’s session has expired) then a message is displayed and an HTTP redirect is performed to the sign-in page. The actual verification of the entered 2FA token or code happens next. The instance of the User class (lib/user.rb) that represents the current user is retrieved from the session and a new verify_code method performs the verification. The code for this method is shown below:
def verify_code(params = {})
    code = params[:code]
    return false if code.blank?

    totp = ROTP::TOTP.new(@@credentials['secret'])
    totp.verify(code)
  end
First a simple sanity check is undertaken that a code was entered at all. The method fails i.e. returns false if one wasn’t. Next the ROTP RubyGem is used to create a new TOTP object, passing in the valid secret that was previously generated as part of the provisioning process (this will be detailed later). As per last time, all of the valid authentication information is stored in a YAML configuration file named credentials.yml in order to keep the example application simple. For a real application this would probably be stored safely away in a database table.
Finally, the TOTP object’s verify method is called to verify the second factor code entered by the user and this boolean becomes the verify_code method’s return value. One nicety of the ROTP gem is that it also provides a verify_with_drift method that can be used to accommodate slight differences in time that might be present between the authenticator app running on the mobile device and the server where the web application is running. The ROTP gem’s README has the details.
Once the code entered by the user has been successfully verified, there’s some bookkeeping around creating or deleting the cookie depending on whether the Remember this computer for 30 days checkbox is checked or cleared. The last step within the POST route handler for the second factor form is to store the valid token flag in the HTTP session and perform an HTTP redirect to whatever URL the user was originally trying to go to.
Whilst we’re talking about the second factor form, one important subtlety is that an attacker might guess the form’s URL and go straight to it in an attempt to completely bypass having to enter any sign-in credentials (first factor). We prevent this by checking there’s a user object in the HTTP session before presenting the second factor form, regardless of how it was arrived at:
get '/signin/secondfactor/?' do
  unless session[:user]
    flash[:notice] = 'Please sign in first.'
    redirect '/signin'
  end
  erb :second_factor, locals: { title: 'Sign In' }
end
The /signout route is more or less the same as before, the only addition being a line of code that removes the valid token object from the session. This is what the route handler looks like now:
get '/signout' do
  session[:user] = nil
  session[:valid_token] = nil
  flash[:notice] = 'You have been signed out.'
  redirect '/'
end
The only detail left to cover is to go right back to the beginning with the generation of the base 32 secret key that’s used to provision the authenticator app. As usual, the ROTP gem’s got us covered. The snippet below illustrates creating a new ROTP::TOTP instance seeded with a base 32 secret and then generating a provisioning URI:
require 'rotp'

secret_key = ROTP::Base32.random_base32 # => 'sud5pjpxpqbfflu7'
totp = ROTP::TOTP.new(secret_key)
totp.provisioning_uri('user@example.org') # => 'otpauth://totp/user@example.org?secret=sud5pjpxpqbfflu7'
In time-honoured fashion I’ll leave it as an exercise for the reader to wrap this up into a sign-up flow that stores the secret key and includes the generation and display of a QR code an authenticator app can consume.